Get started with Html, CSS, Bootstrap and Django Framework
Get started with Django Python Framework with ease.

Piyush Yadav is a Full Stack developer who loves to write about Development and Hacking methods. Can contact at PS: https://heypiyush.vercel.app
Web development has reached the summit of the people's interest in Web development and they are taking their time to become web developers for good. Web development is something through which we can make amazing websites and web apps for our needs or someone's need. But everything seems simple to this point that we will learn HTML, CSS, and javascript and will become a web developers and that is so untrue. While trying to learn web development they often miss some serious topics in web development. Before turning on web development, they must grasp the whole knowledge about this technology and learn everything step by step without missing any crucial point.
This is a myth that you can't do Web development without Javascript knowledge and that is so untrue. You can do web development with Java and Python too, so there is no need for javascript but javascript makes the website lively and do the operations behind the scenes. So, Javascript is the heart of web development.
Today, I am going to show you how can get started with Html, CSS, bootstrap, and Django.
I will be showing images and codes to show how easy it is to get started. So that even a complete beginner can do it.
Setup your Development Environment
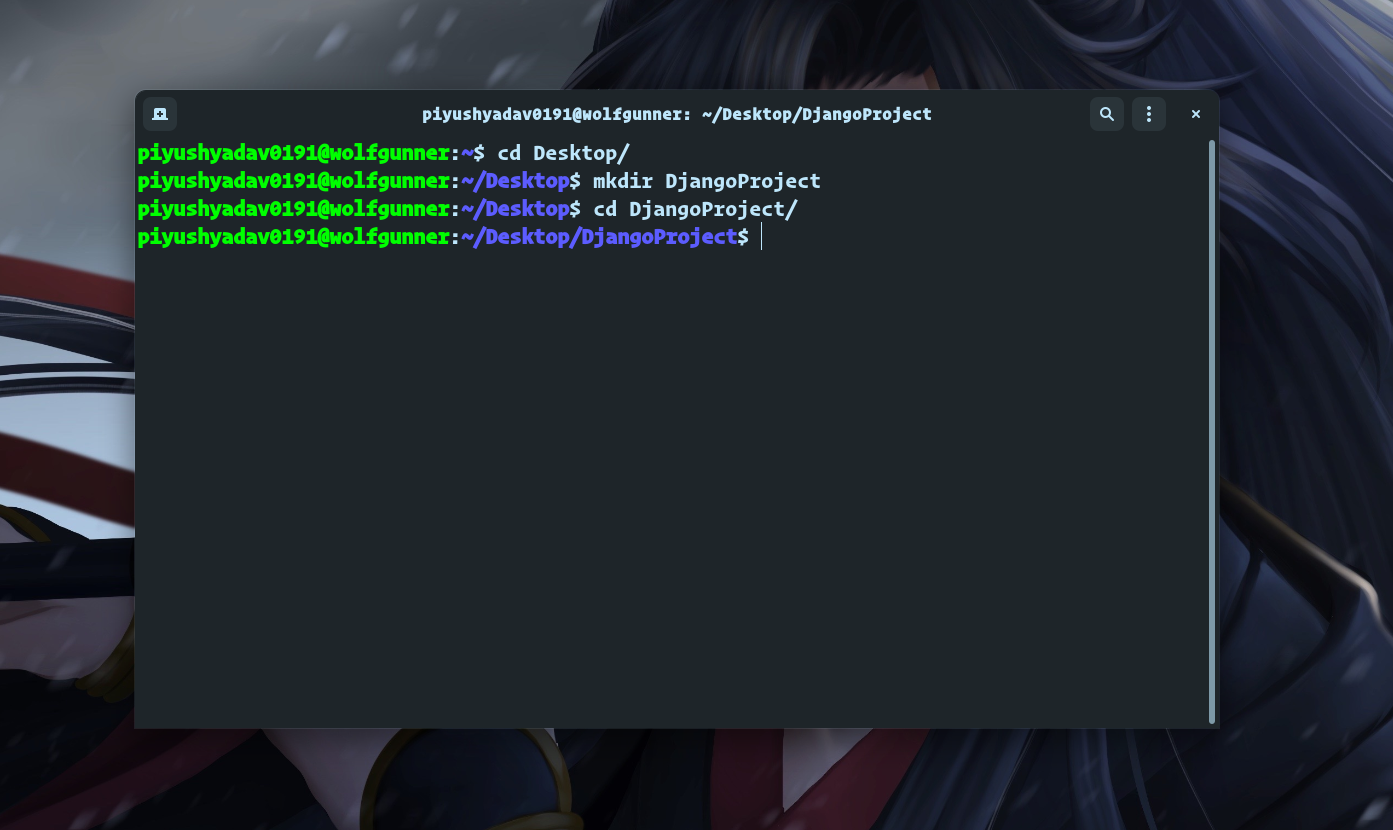
Whenever you are starting your web development project, it's a good practice to create a directory where your project can live on
- Start with Opening your Terminal, CMD, Powershell, or Bash and write the code given below-
mkdir DjangoProject
cd DjangoProject
Make sure that you have python installed in your system.
I will be using the python3 version.
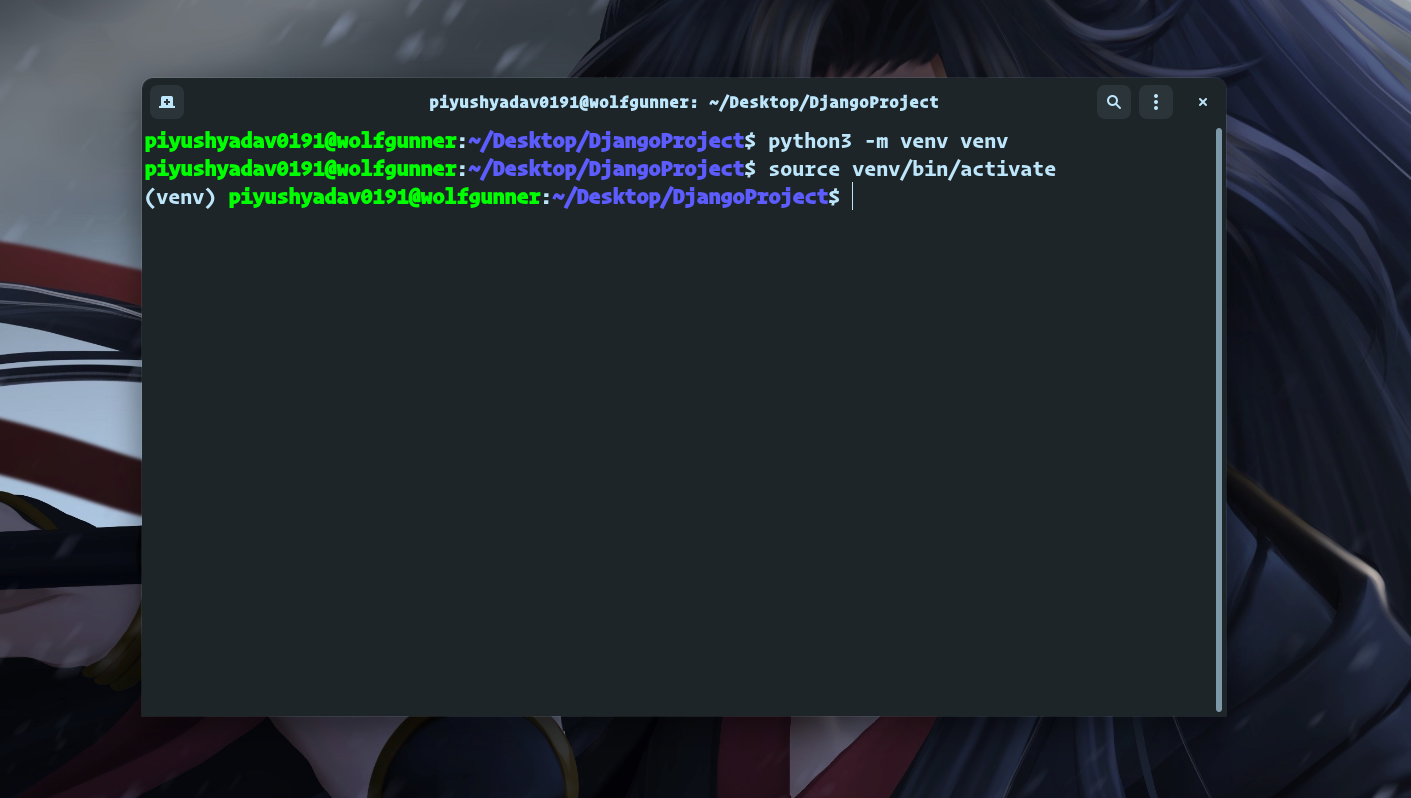
- Once you are inside the folder of the project you just created. The first major step should be to set up a virtual python environment and the python virtual environment makes it easy to manage the dependencies of the project.
There are many ways to set up a virtual environment but we are going to use my simple and easy method for set up the environment. Type the given command to get started
python3 -m venv venv
This command will create a venv folder where you will have python standard libraries.
- Activating the virtual environment.
For Mac & Linux users - source venv/bin/activate
For Windows Users - C:\> venv\Scripts\activate.bat
you will know that the virtual environment has been activated by showing the env written on the shell.
- Now that you have installed the virtual environment, It's time to install Django in your system.
Make sure that you have pip installed beforehand.
You can install Django by using the following command
pip install Django
Let's create a Django project
Make sure you are in the folder you created and type the following command given below
django-admin startproject MyFirstProject
Once your setup is complete, you start the server and check if everything is good to go or not by typing the command given below.
cd MyFirstProject
python manage.py runserver
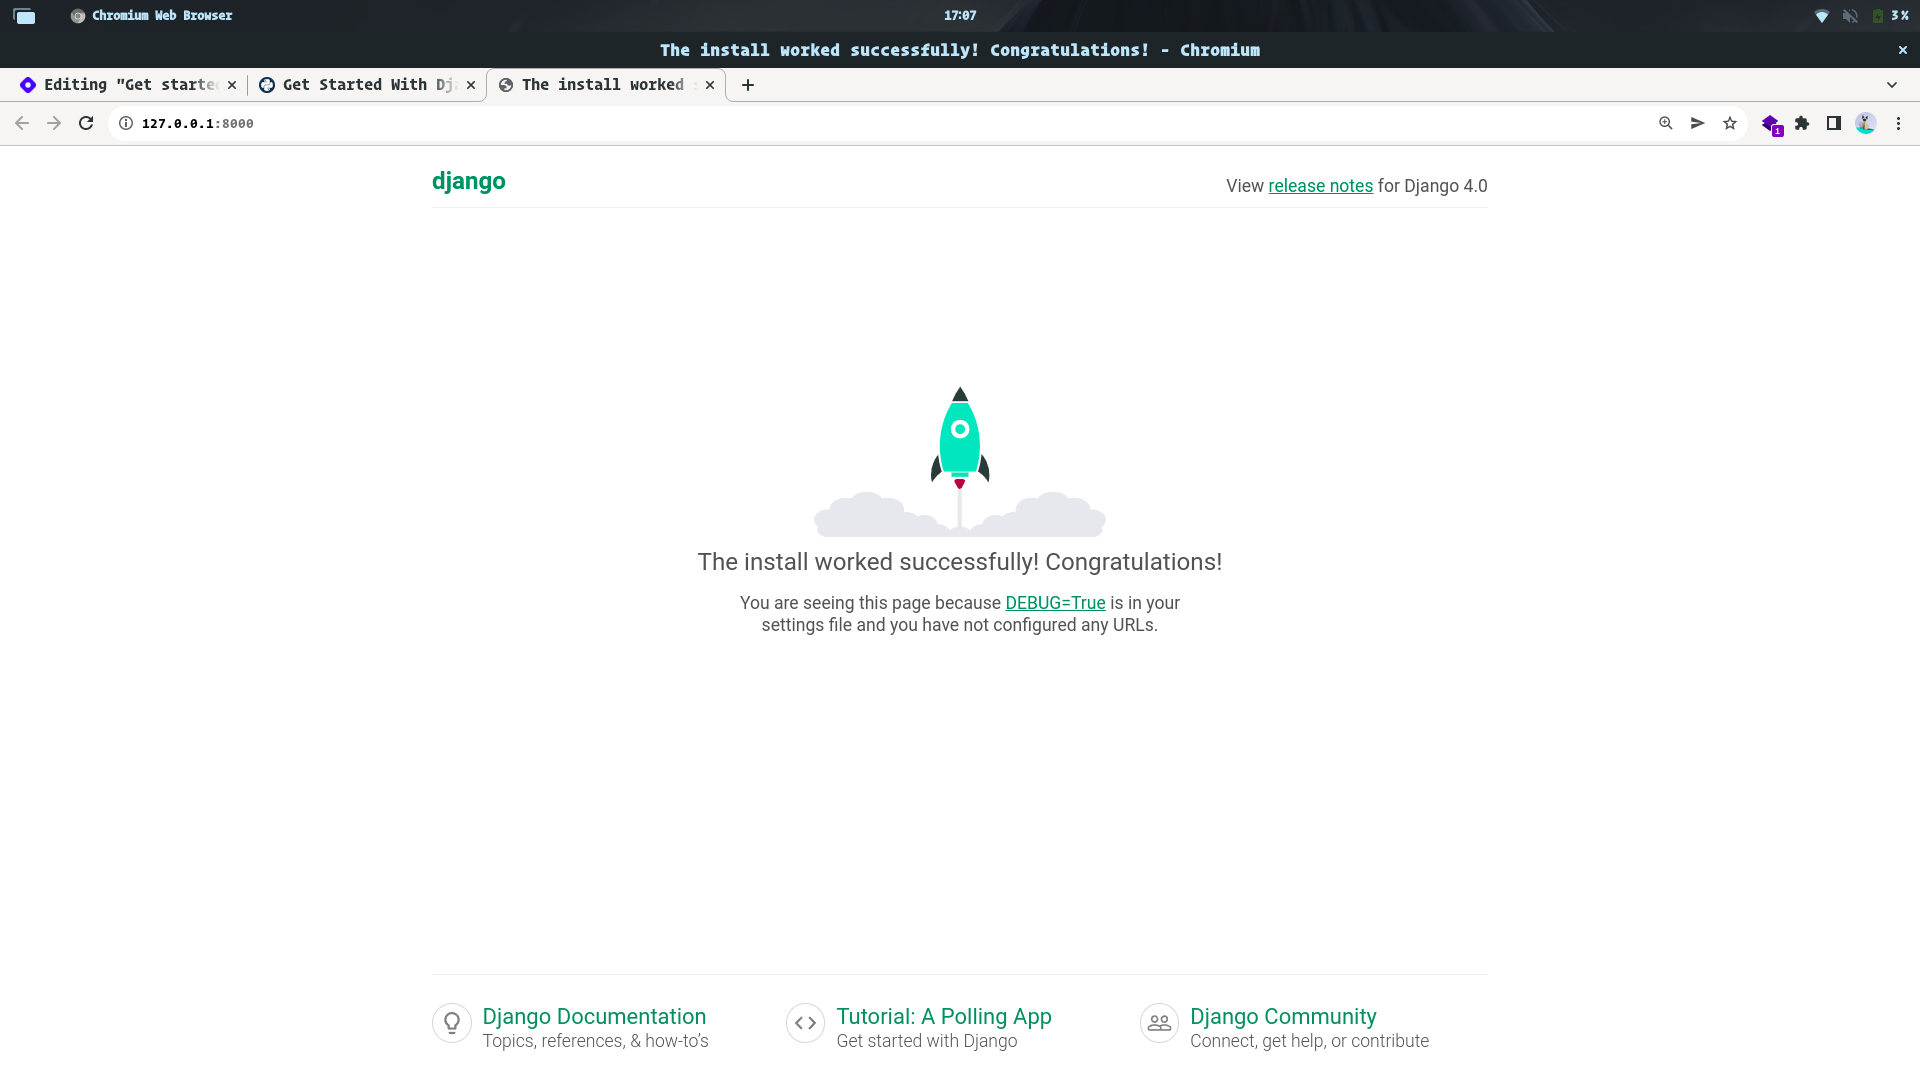
Congrats, you created the Django site!
Create a Django application
For this tutorial, we will create a hello world application with the Django framework
To create an app, type the following command given below
python manage.py startapp hello_world
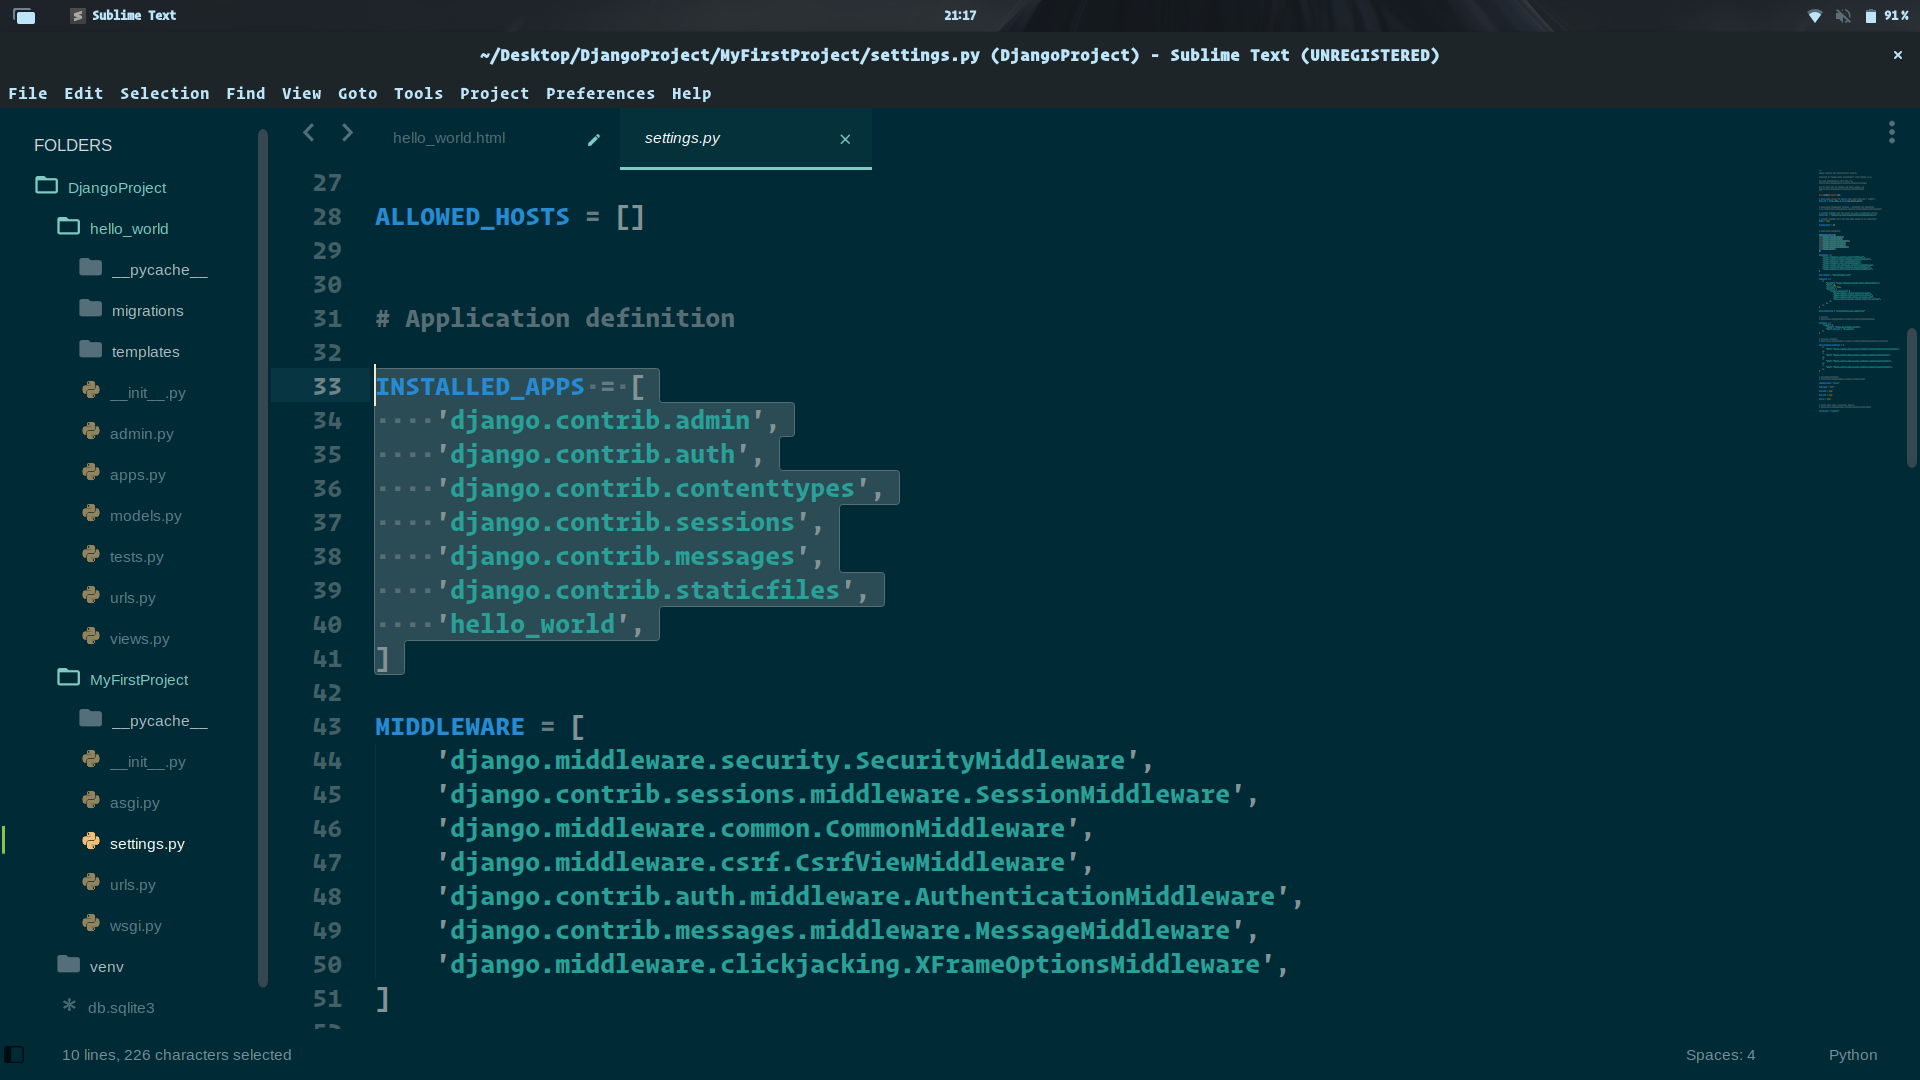
Paste the given code below to the MyfirstProject/settings.py
INSTALLED_APPS = [ 'django.contrib.admin',
'django.contrib.auth',
'django.contrib.contenttypes',
'django.contrib.sessions',
'django.contrib.messages',
'django.contrib.staticfiles',
'hello_world', ]
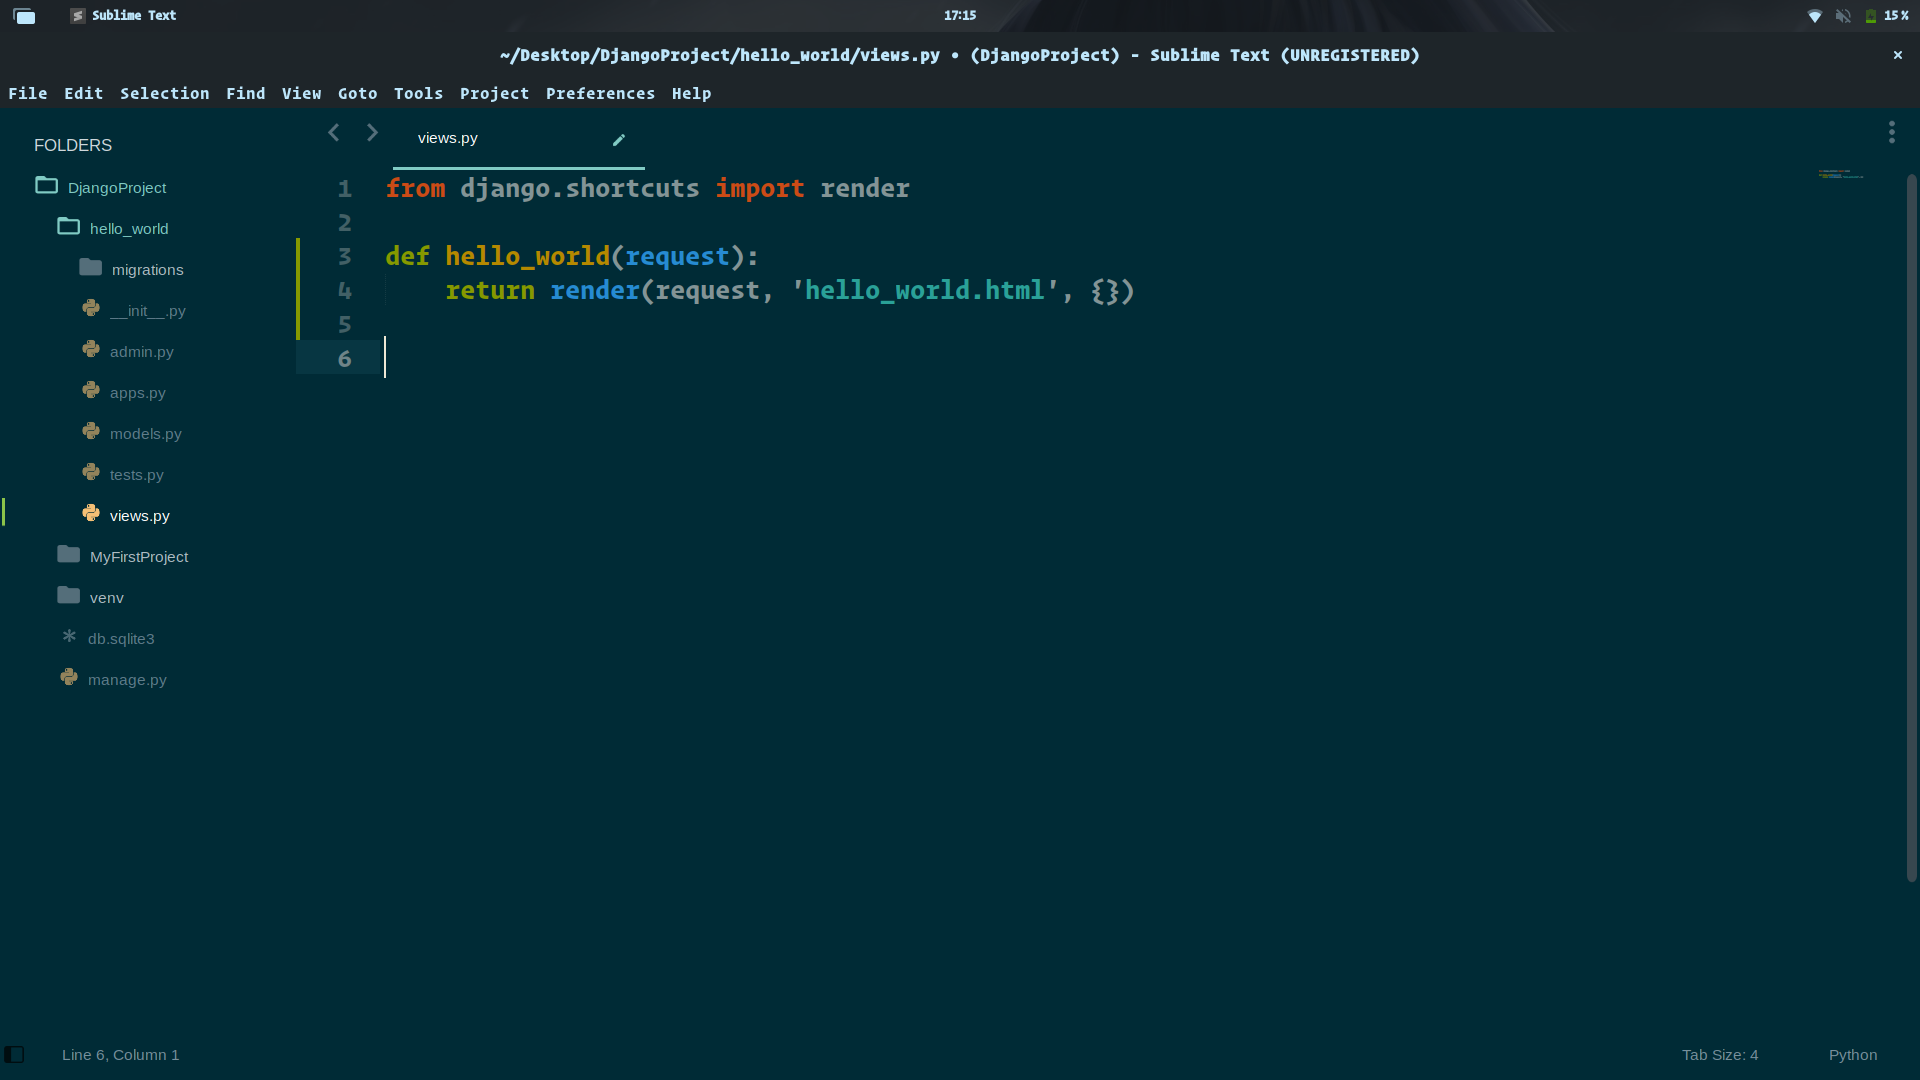
- Create a View
Views in Django are a collection of functions or classes inside the views.py file in your app directory. Each function or class handles the logic that gets processed each time a different URL is visited.
Navigate to the views.py file in the hello_world directory. There’s already a line of code in there that imports render(). Add the following code:
from django.shortcuts import render
def hello_world(request):
return render(request, 'hello_world.html', {})
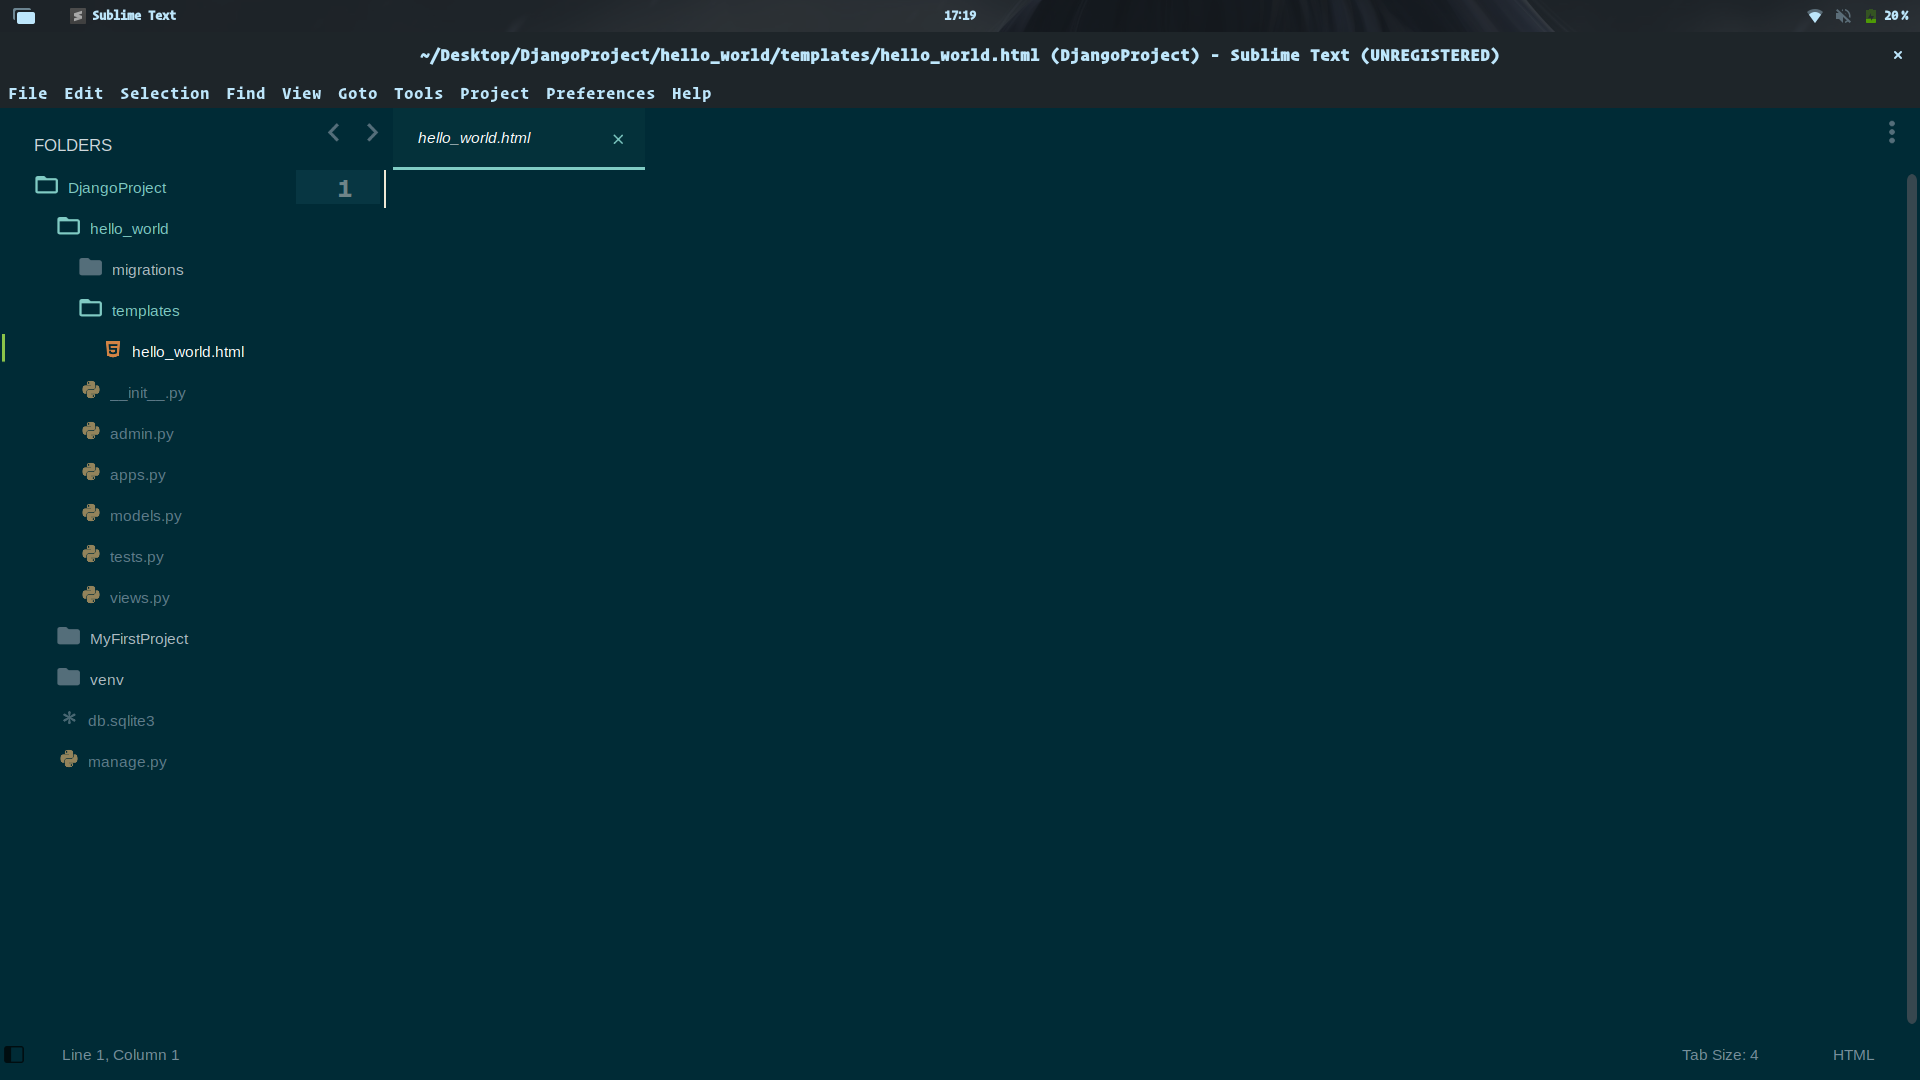
- let's create HTML file
For creating an HTML file, you should first make a directory named Templates
mkdir hello_world/templates
touch hello_world/templates/hello_world.html
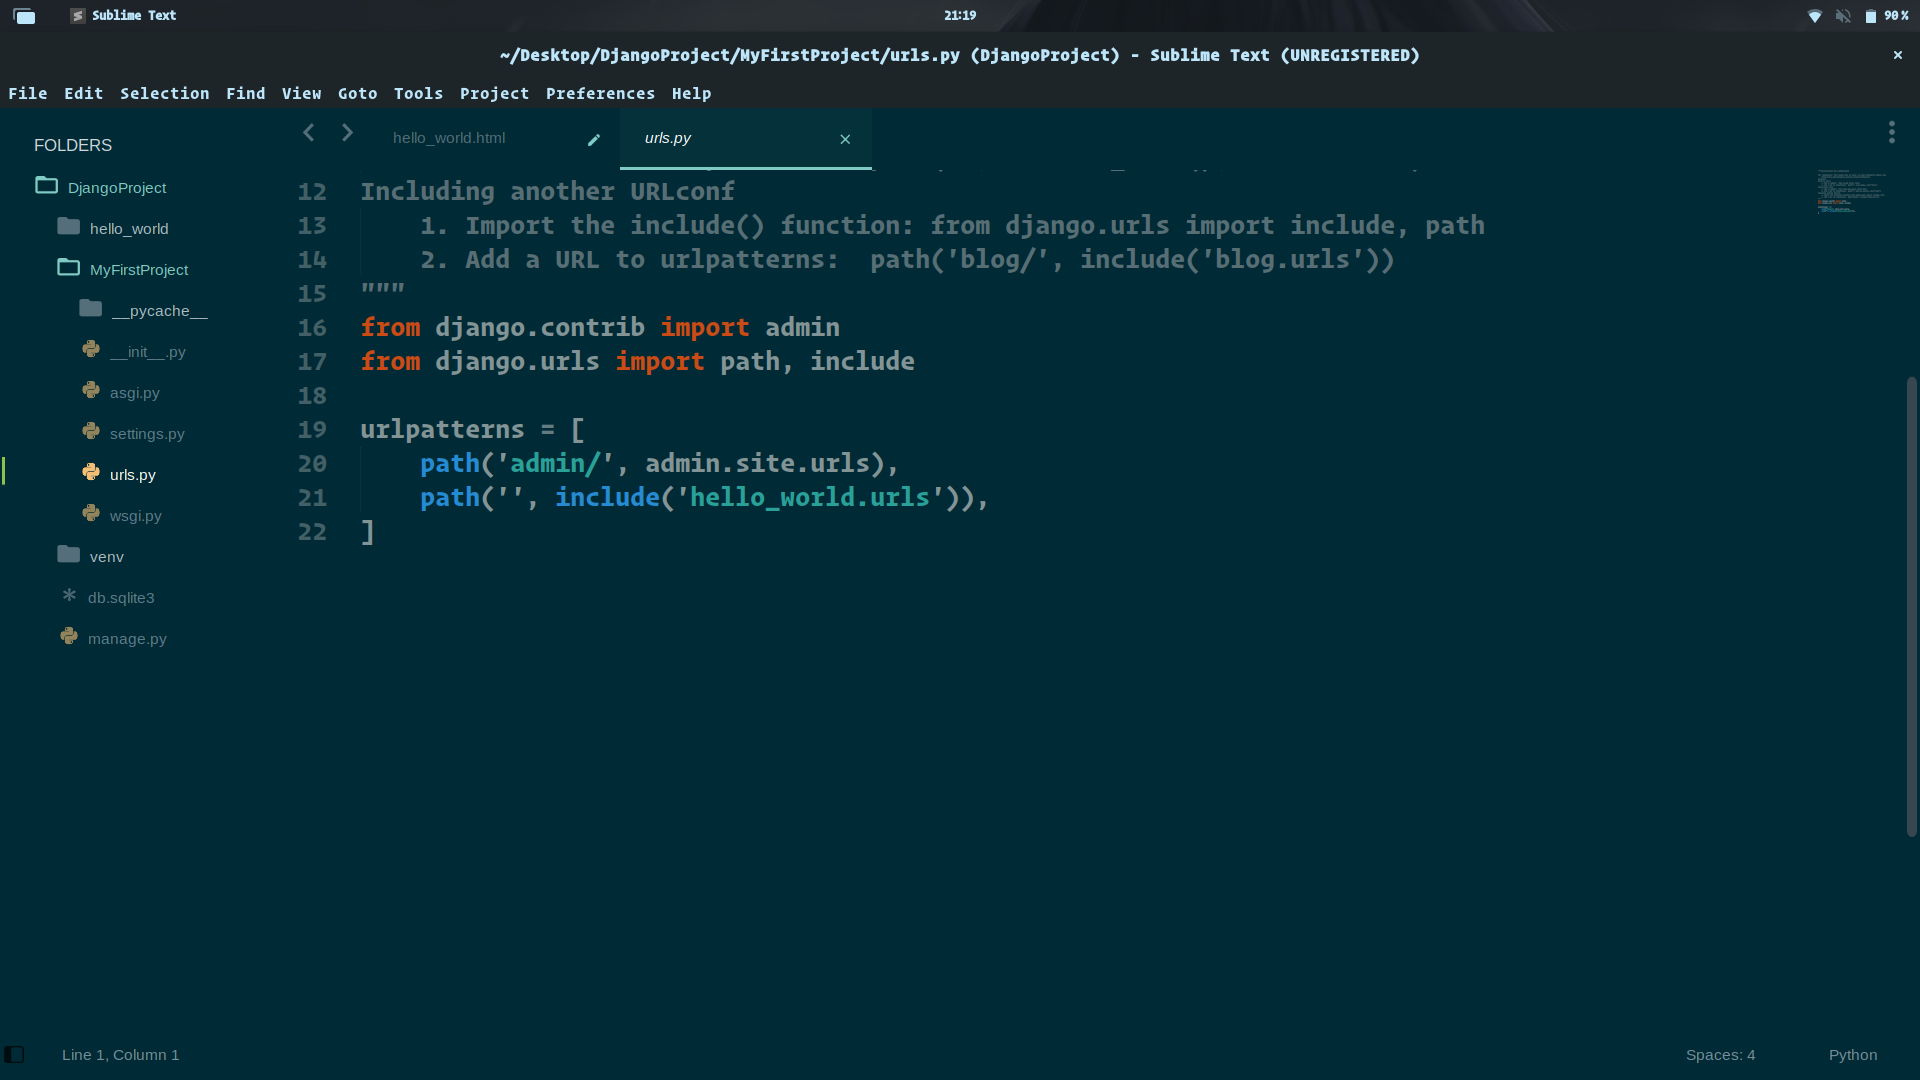
- include the code written below in urls.py which is in the MyFirstProject.
from django.contrib import admin
from django.urls import path, include
urlpatterns = [
path('admin/', admin.site.urls),
path('', include('hello_world.urls')),
]
- This looks for a module called urls.py inside the hello_world application and registers any URLs defined there. Whenever you visit the root path of your URL (localhost:8000), the hello_world application’s URLs will be registered. The hello_world.urls module doesn’t exist yet, so you’ll need to create it:
touch hello_world/urls.py
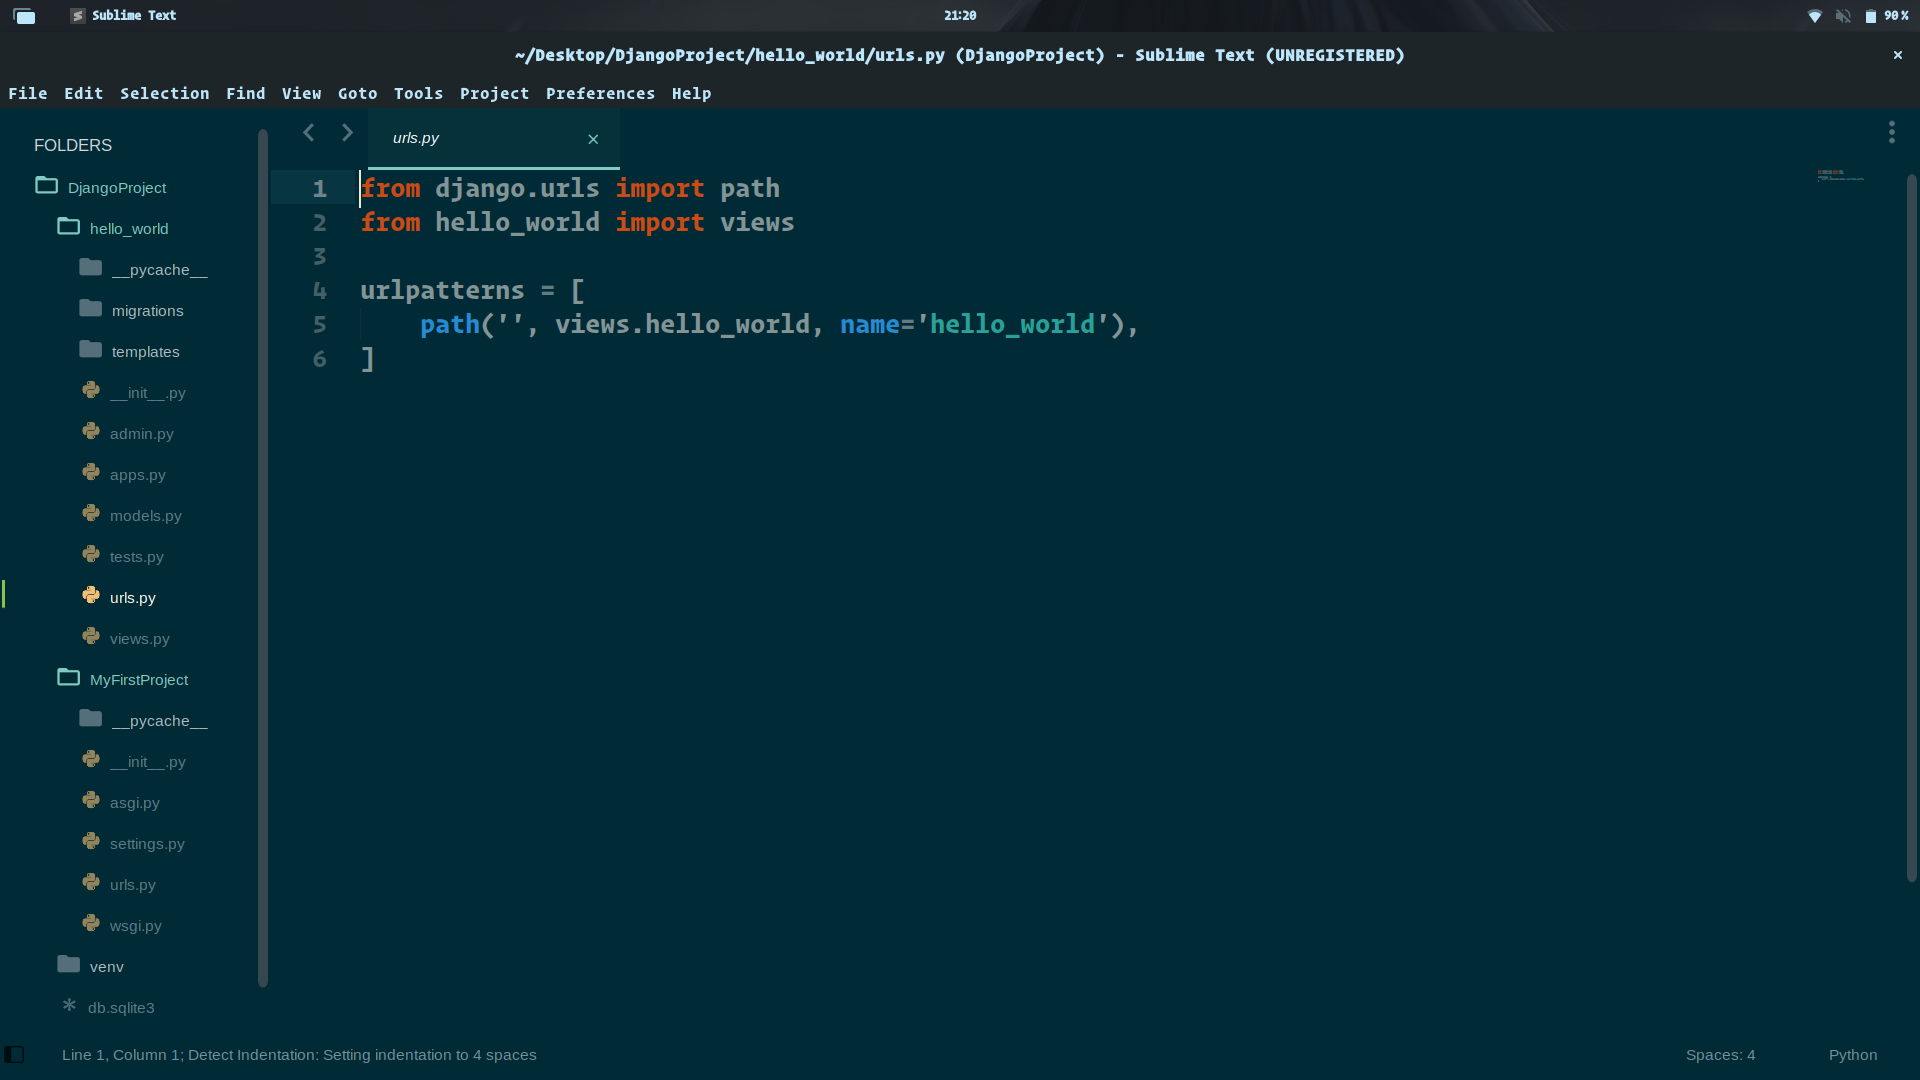
- Inside this module, we need to import the path object as well as our app’s views module. Then we want to create a list of URL patterns that correspond to the various view functions. At the moment, we have only created one view function, so we need only create one URL:
from django.urls import path
from hello_world import views
urlpatterns = [
path('', views.hello_world, name='hello_world'),
]
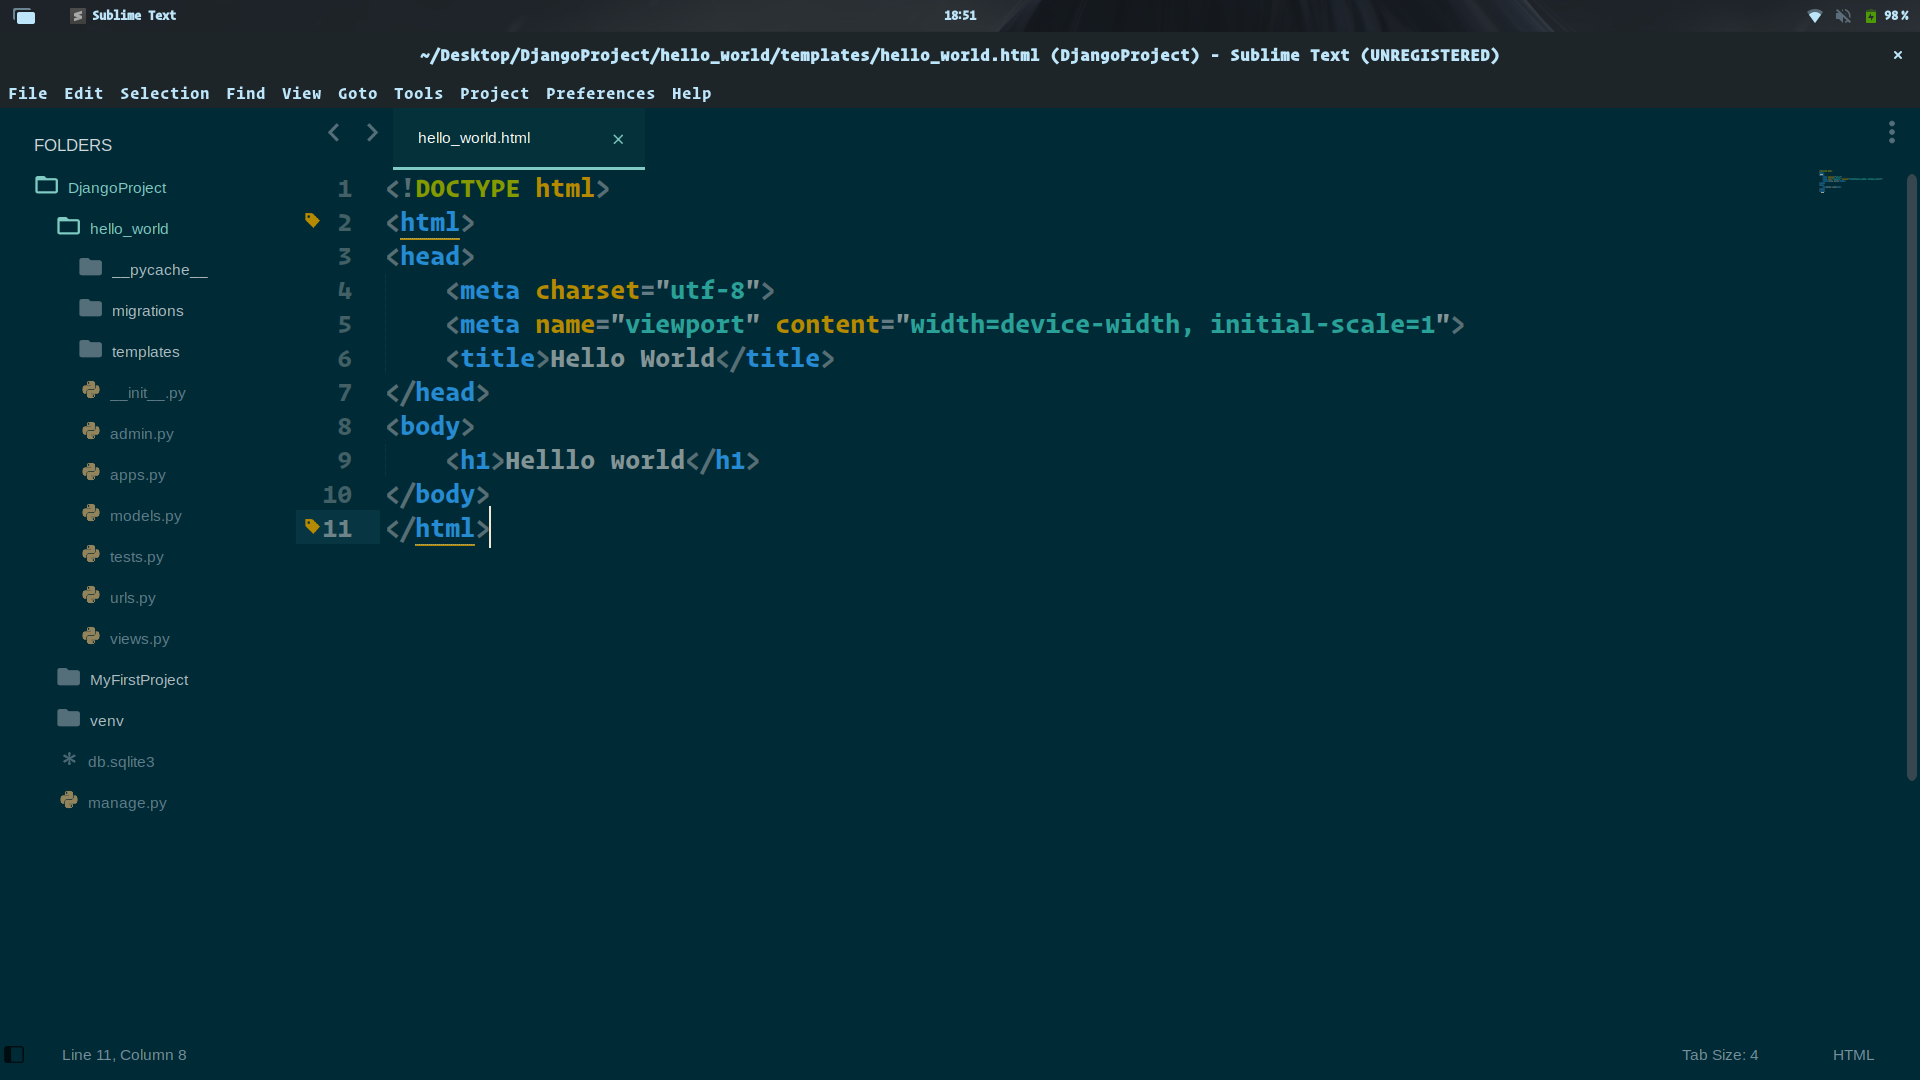
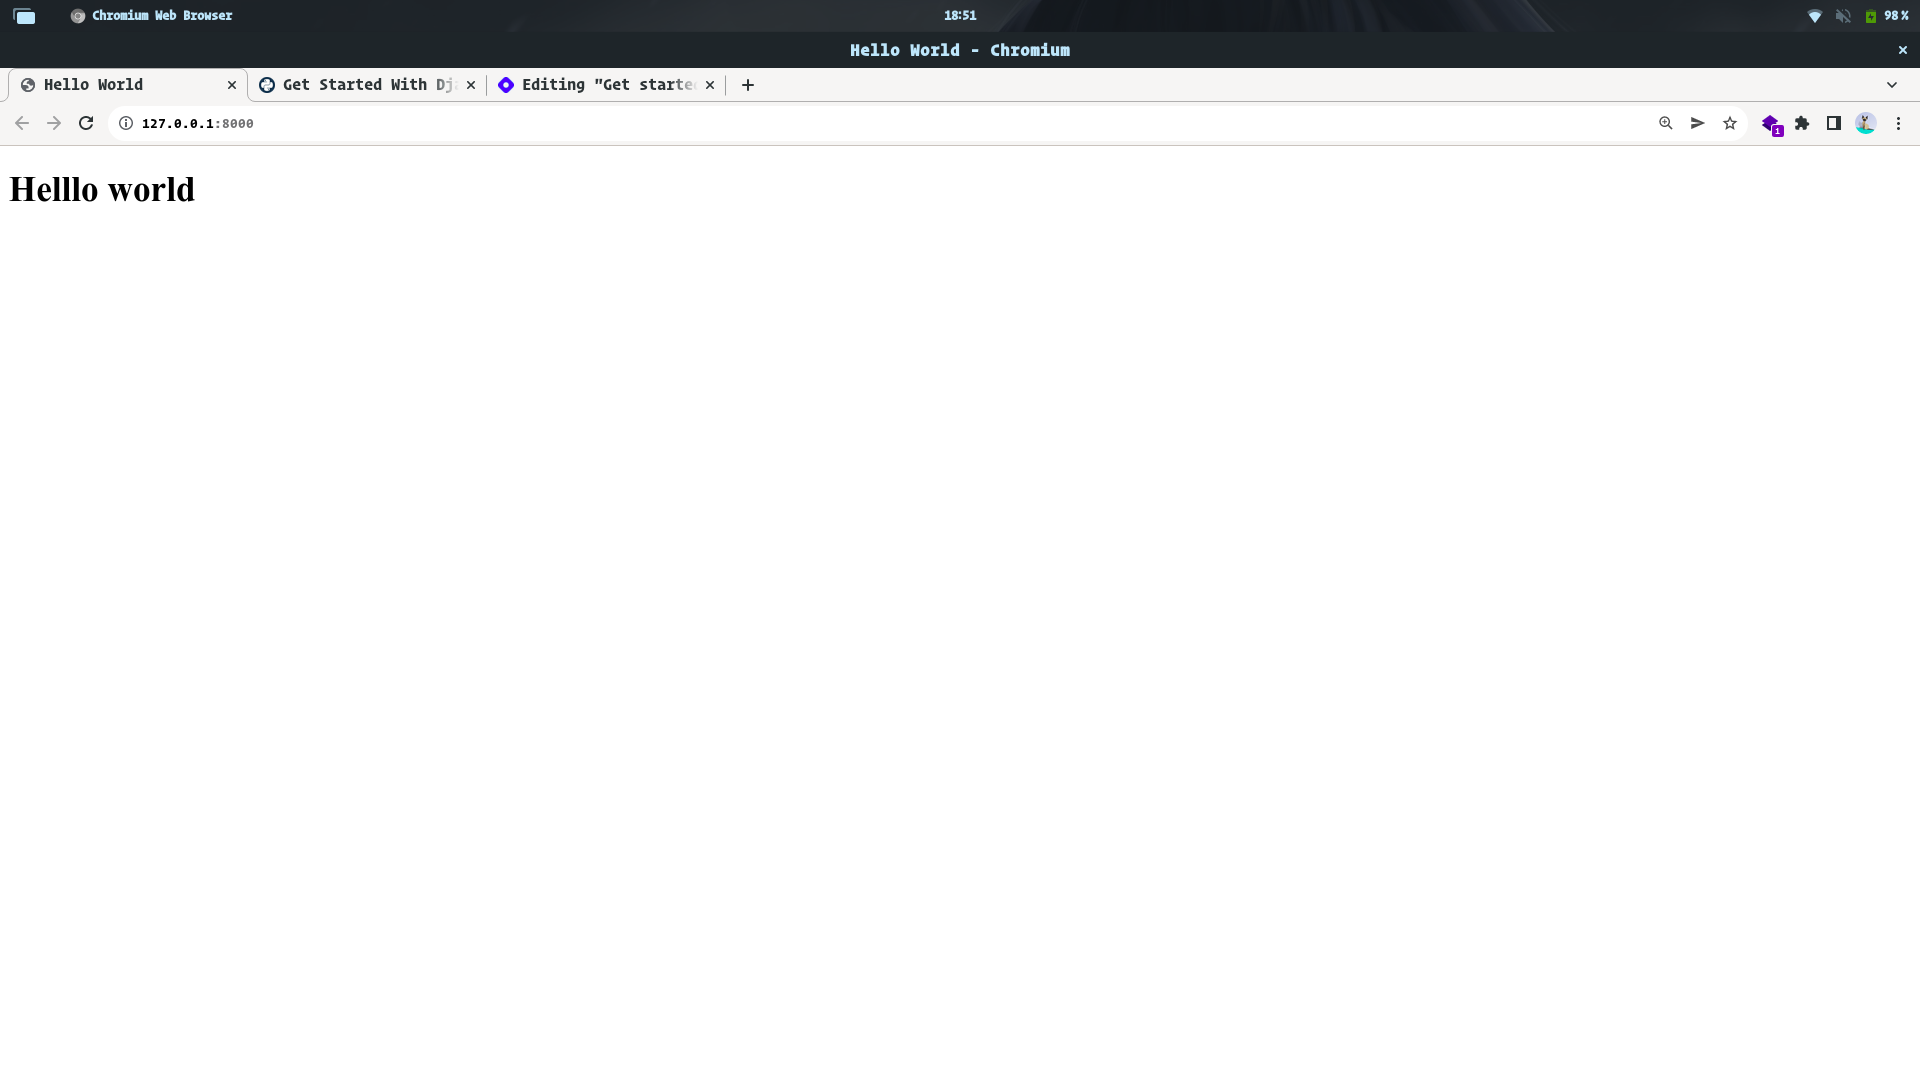
- Now, after writing some simple heading on the Html page and your web page will look like this:
Adding CSS
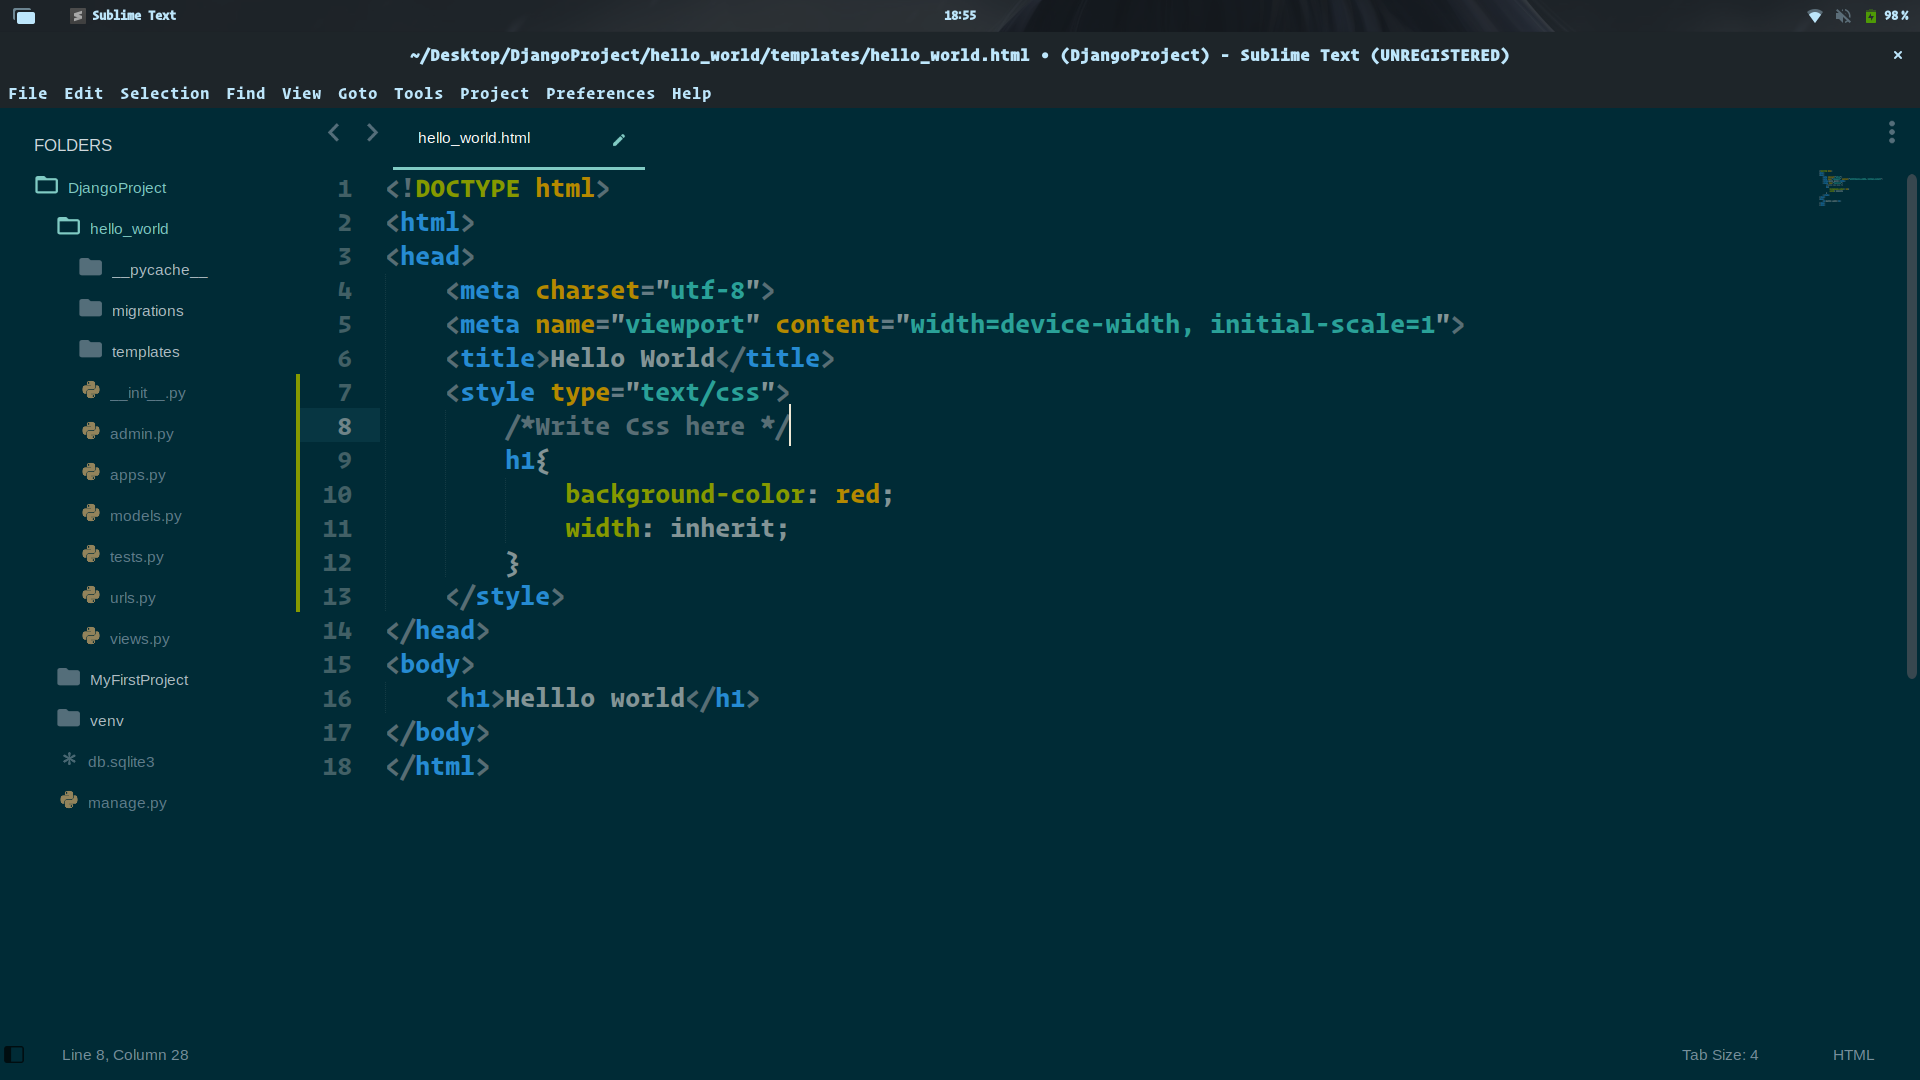
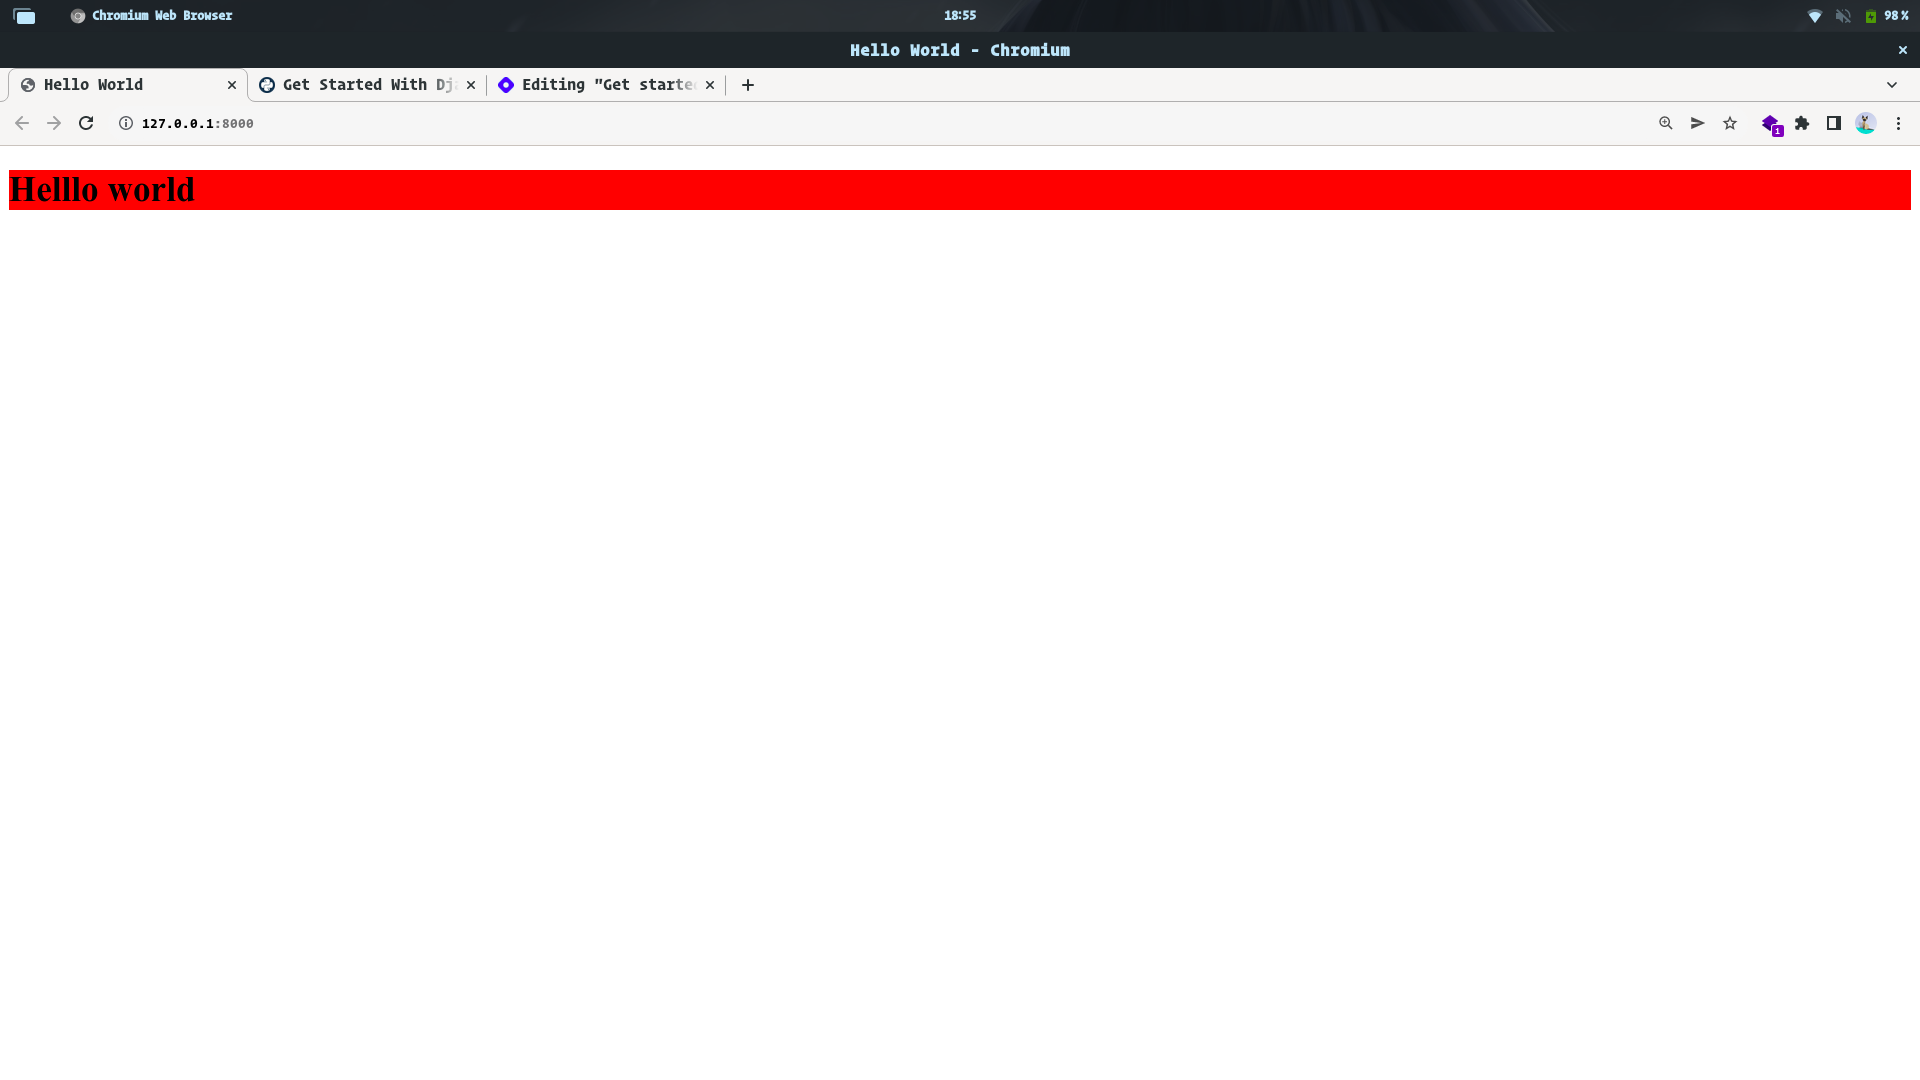
I will be showing a simple way to write CSS for your Django web application.
- You can add CSS to your web page by adding style tag in the head section
Adding Bootstrap
- You can simply add the CDN link of Bootstrap to your website
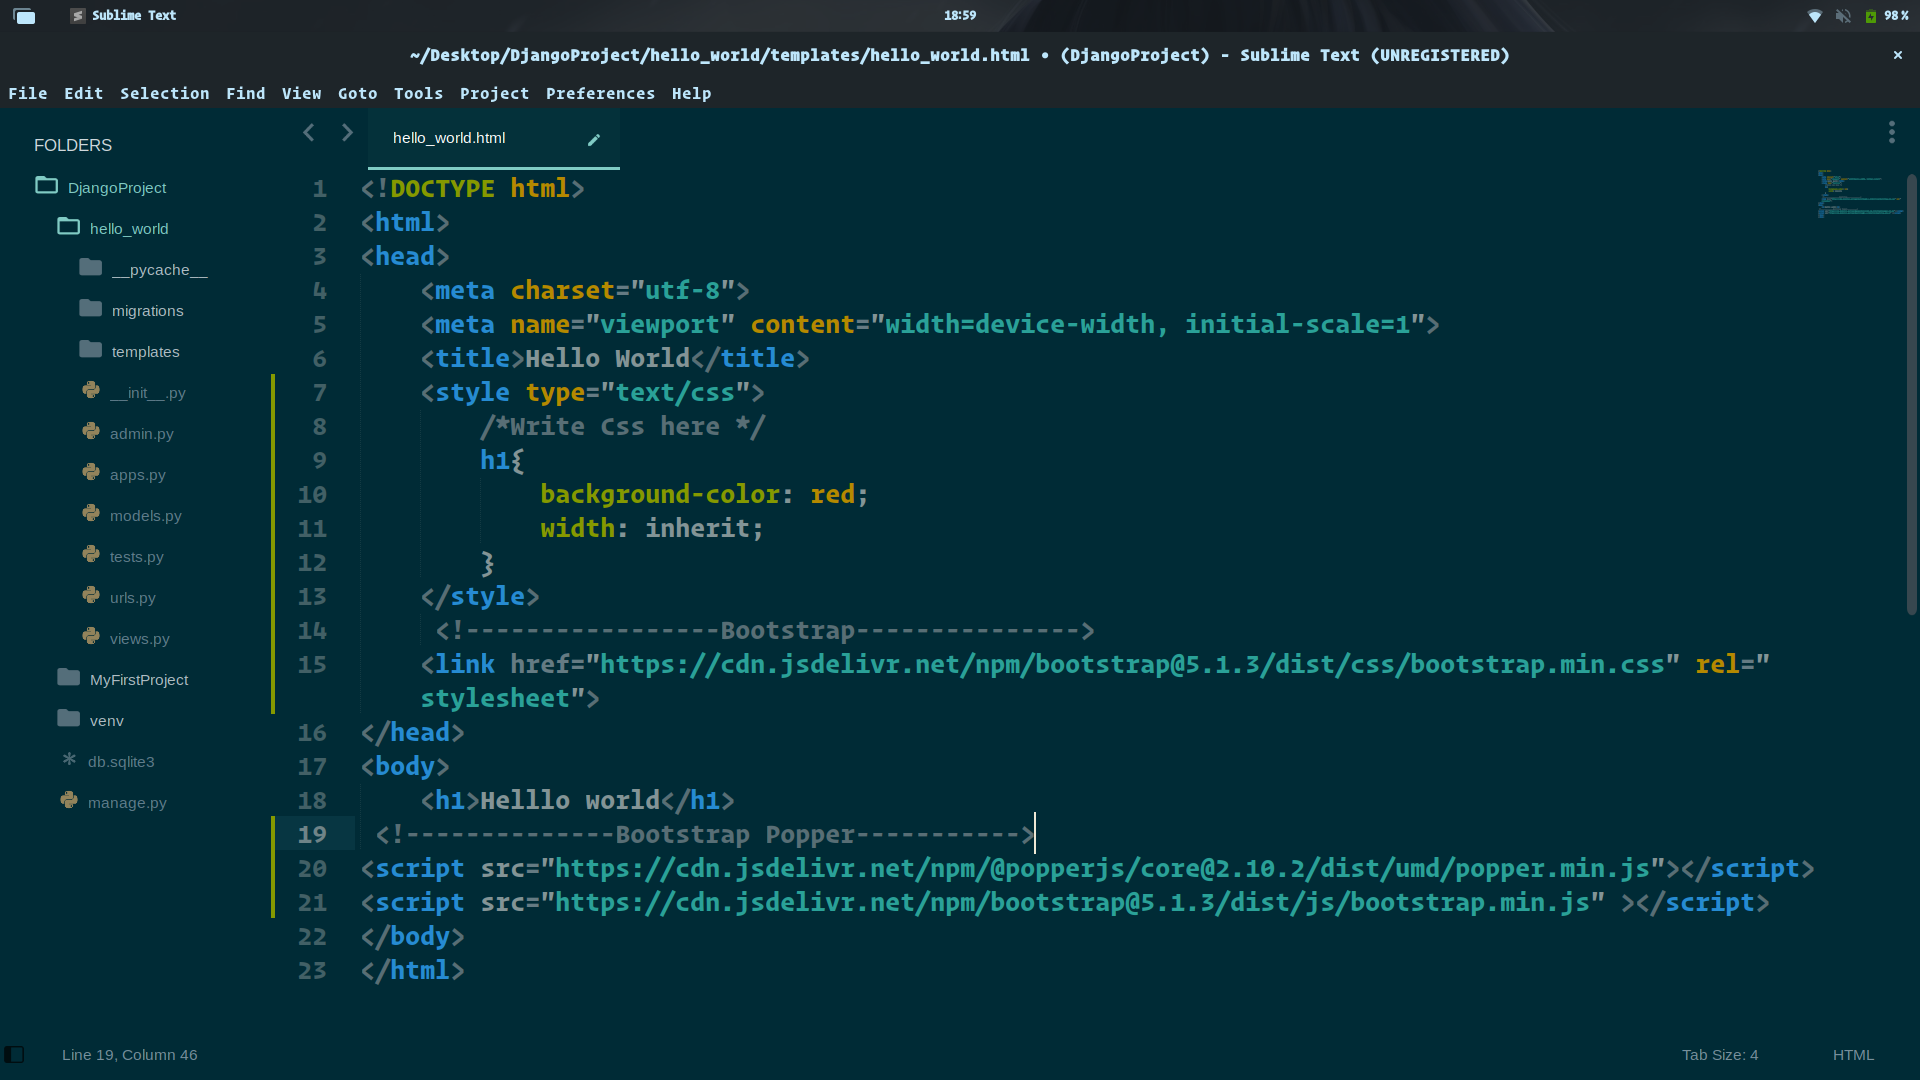
You can refer to images to clear your doubts about how the folders and files are being arranged and how to include CDN.


